

The first 20 days of school are all about procedures and routines. My district actually gives us the first 20 days for setting up procedures. I honestly can not say more WONDERFUL things about giving teachers 20 school days to get things established before hitting it. Y'all this year my centers were the best they have EVER been.
We started slow... I mean snail's pace slow! Heck we had the time. We started with everyone doing similar activities but working with a partner. This is one example. This is a matching game. It's from one of Deedee Will's sets called... A Cat, A bear, A tree math and literacy centers (click the picture below). We learned lots of games and how to play them. Matching or building games like this one start at letter ID, move to match letter and picture by sound, and finally by the spring we are building CVC words and sight words.

We played lots of games in the first 20 days. Games like Bam (pop, bang-- lots of names for it), letter puzzles, matching, bingo. Anything that could be done in partners we did it! Over and over, changing partners many times to keep from getting board.

This is our book or library. This station is one of 2 that I open ASAP. As soon as we have had our lessons on how to handle books (this comes really early in readers workshop) and 3 ways we can read a book (look at the pictures, make up a story to go with the pictures, or read the words). Each book has a icon in the upper right corner that matches one on a bucket. The hard part the first few weeks is getting the books back into the right bucket. We practice whole group as part of our early readers workshop on getting a book, reading the book, and putting the book back. I reinforce this by checking in with the children in this center. We do A LOT of practicing by placing new books into the center. The kids get to add the books to the right bucket. Yep I add 20 books at a time so that every child gets a chance to place the book into the correct tub. How do I do that? Scholastic book club! I also get my listening centers from the monthly flyers. ;)

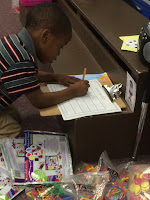
These boys are using write the room. I LOVE this center and so do the children. I have used themed WTR (write the room) cards, pick a letter and find words in the room with that letter, or write the words you know. It is easiest for me to teach this center by using themed cards where the picture that is on the card is also on the recording paper. We start this whole group. Every child gets a clipboard, paper, and pencil. We start at our carpet spots and I send away small groups of students to "find the words". When they finish they return to me and I put a sticker on their paper and into their cubbies the papers go! We will do the same one several times, all I have to do is change the picture location on the recording paper. This is probably one of the easiest centers to maintain.

These two are working on puzzles at red table. This is the "game and puzzle station" and it is also easy to maintain for the school year. At the beginning of the year we have out the wooden puzzles (no real teaching needed to start with wooden puzzles.) Then we start adding games as we learn how to play them. I have high ho cherry-o, don't break the ice, chutes and ladders, and candy land that we put into this center.

This was actually a math center but it shows so well how each table has it's own activity going on. Here the littles were measuring using links. All of their center supplies are in the bucket. And they pull the labeled bucket and bring it to the table. I teach them to make room by putting the bucket on the floor under the table, and they can move the table trash cans or supply caddies too.

This is our magnetic center. These littles decided to sort the letters by color! And no that wasn't one of the options that I had ever thought to do at this station. We sort letters, build names, build words, match pictures to words, but I had never thought to sort the letters by color! That became an activity. This giant magnetic board is just an oil drip pan from Walmart with holes drilled in the 4 corners. I use command hooks to hang them on the wall.


This is the last center I am going to talk about today. It's the pocket chart center. This is a poem that we had worked on in whole group about our names. Once we had gone through every child I modeled and opened pocket chart center. There is a small basket that slides under the pocket chart that holds all the pieces. The things you can do in pocket chart are kind of endless! I am working on a TPT file for pocket chart that I hope to have ready by the end of July. But some of the things we sort: letters (tall, small, tail, straight lines, curved lines) beginning sounds, matching letters (upper to lower, upper to upper, letter to sound), build cvc words, build sentences, rhyming match... and the list goes on and on. The great part about this pocket chart is that I hot glued it to our chart stand. This gives me the ability to teach the center whole group RIGHT where they are going to be using it!


No comments
Thank you for commenting! I love to hear how others where inspired by my creations.