One Set One Day- Ornate Garden

Friday, May 29, 2020
Y'all! I'm back today with a one set one day challenge post. Today I am playing with the Ornate Garden suite.


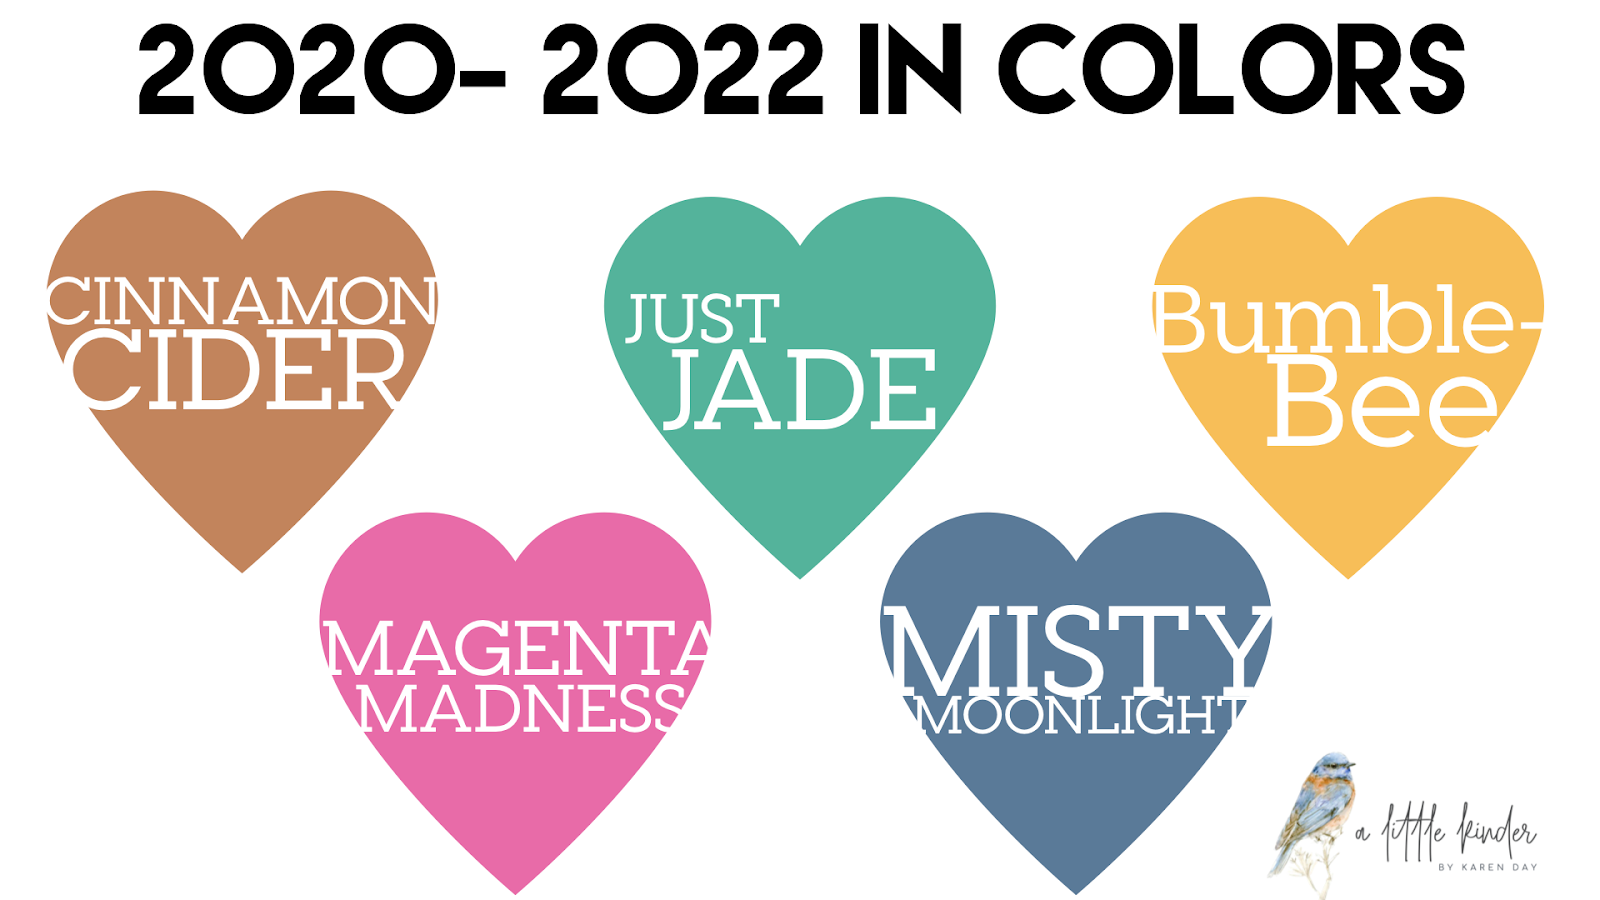
This first card uses the retiring 2018-2020 In Colors. I used the Stamparatus (known as a stamp-a-saurs in our house) to make sure everything lined up. A little Basic Black cardstock around the thank you a few sequins and you have a great looking card! However, if you ask my hubby... it's boring.. LOL! He is such a mess. I love the ease of this card and how by simply changing the color scheme it could be used in any season or situation!


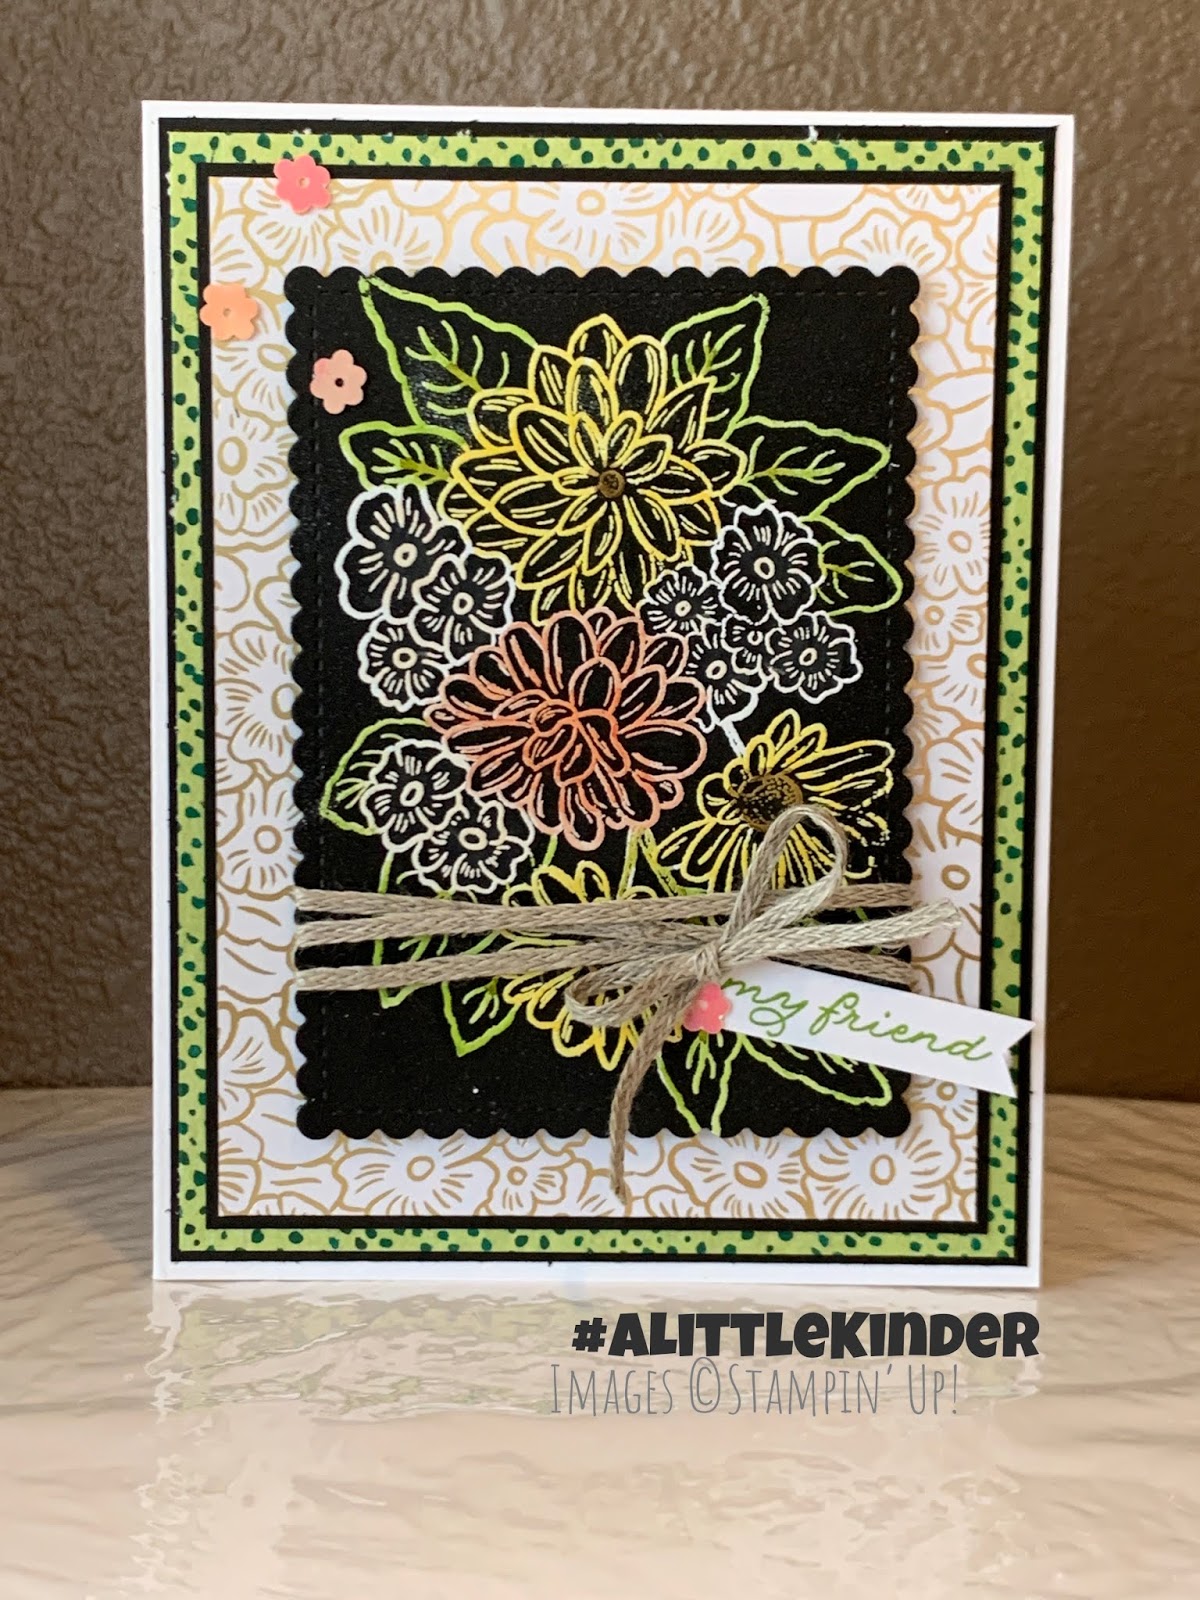
 This card is anything but basic, but it isn't hard either. I used White Stampin' Emboss Powder on the main image and then colored it with the Stampin' Blends! Y'all it was super easy but packs so much punch! And there are SO many sets in the new catalog that you could use with this technique.


This card takes us in a totally different direction. As I was cleaning up from embossing, I noticed this little chick from the Welcome Easter set sitting on my desk. I added one of the daisy images from this set and bam... cuteness overload!!!

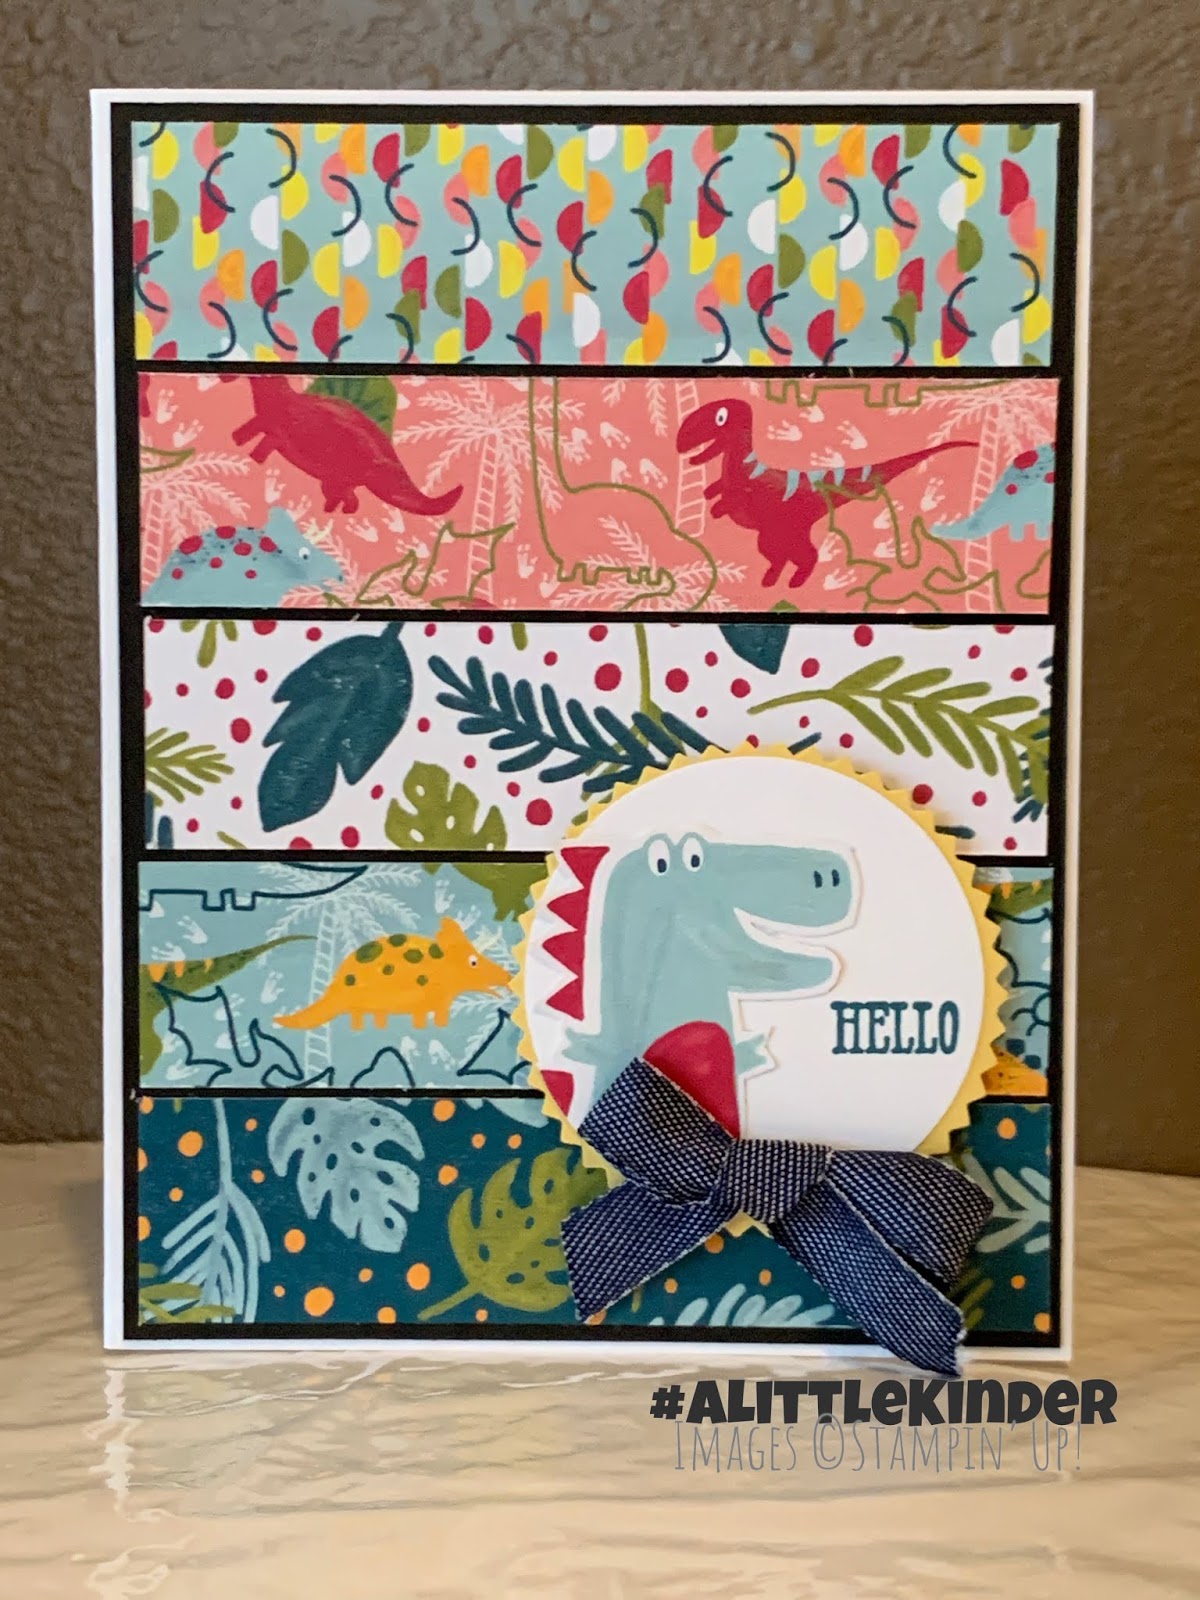
These are the last two cards I made during my "one day" session. The first is mainly Designer Series Paper and the second is all about the stamping! These both showcase how easy it is to work with the coordinating Stampin' Up! products. I didn't have to go searching and guessing what might or might not work together. I simply followed what Stampin' Up! had already put together!! The daisy stamps have wink of stella to add some drama!

Products Used:


You can now follow my blog by email! Yep... brand new posts in your inbox!

Are you in the United States? I would LOVE to be your Stampin'Up! Demonstrator!


If you are in the United States and not currently working with a Stampin' Up! Demonstrator, you can order supplies in my online store, here.


0

Get Ink'd... May Paper Pumpkin Alternatives

Wednesday, May 27, 2020
Hey Y'all!
Today I want to share some alternatives for the May Paper Pumpkin. I can not begin to tell you how much I am loving this kit. The cards as they are designed are beautiful! The colors pop and are so trendy!! I have 4 cards to share with you, although 3 are different takes on the same design.


 These first three cards all use different color schemes but are the same basic design. This is a HUGE time saver (and something I do to get my muse back). I started with a Whisper White Thick card base and layered papers on top. I love the way layered cards look. I feel like Stampin'Up! makes this so easy with their Designer Series Papers and cardstocks. The first card uses Misty Moonlight, Seaside Spray, and Night of Navy. I LOVE the look of this card!! I added a White Embossed greeting to a solid yardstick and BAM! The next two are patterned off the first one but use a more colorful color scheme. I used Bermuda Bay, Gorgeous Grape, and Melon Mambo inks for a bright cheerful rainbow.  One card features Just Jade and the other is Magenta Madness.  A few gems... and the card is complete.


This last card uses the left over sheet that held the cloud die cuts as a stencil. I used Seaside Spray and Misty Moonlight ink to build these clouds. I added a little wink of stella to the tops of the clouds for sparkle. The greeting is another one of the Paper Pumpkin stamps. I love this card! And I love that if you take a second to look you just might figure out a new way to create something, in this case the clouds.

Products Used:


You can now follow my blog by email! Yep... brand new posts in your inbox!

Are you in the United States? I would LOVE to be your Stampin'Up! Demonstrator!


If you are in the United States and not currently working with a Stampin' Up! Demonstrator, you can order supplies in my online store, here.


0

One Set On Day: Birthday Bonanza

Monday, May 25, 2020
Hey Y'all!

The focus of today's One set One Day challenge is a suite I am going to miss!! Like I really wish that the stamps and dies were staying round because I can see using them on so many cards in so many different color combinations. Here are the cards I created:


Details for today's card

I loved making these cards! They really feel like a little celebration in an envelope. I wanted to showcase the Designer Series Paper because I am a recovering paper hoarder! Yes, my name is Karen and I struggle to cut my paper. It's just so beautiful and I hate to cut it up. But I am recovering and now when I get a new pack of paper, I take 1 sheet of each pattern and cut it to card front size (for me that's 4"x5 1/4"). I would not let this suite retire without adding to your collection. Just trust me on this.

Products Used:


You can now follow my blog by email! Yep... brand new posts in your inbox!

Are you in the United States? I would LOVE to be your Stampin'Up! Demonstrator!


If you are in the United States and not currently working with a Stampin' Up! Demonstrator, you can order supplies in my online store, here.


0

One Set One Day: Dinoraor Designer Series Paper

Thursday, May 21, 2020
Hey Y'all!
I'm continuing today with the theme of retiring "sets". I wanted to make some projects with the Designer Series paper that goes with the Dinoroar Suite. While the stamps and dies will carry over, the Designer Series Paper will not. So let's take a look at what I did.


 I am head over heals in love with this first card! I used one of the Designer Series Papers to cut out the trees, dinosaurs, and a cloud. I used scraps to make the greeting flags. I ran the Whisper White piece through the Subtle embossing folder and it adds some texture to this card. Those cute little background circles were made by putting painters tape across half and sponging color on the other and then switching.


Oh hey! I love that greeting and the Sweetly Swirled Stamp set. I'm sad to see this one retire. I used the two pinks sheets from the DSP and cut them to be blocks on the front of the card. I used the same two papers to create interest on the inside of the card. The card base is Pool Party.


Isn't this card fun? I used the same basic idea as I shared using the Forever Greenery suite. I cut that super cute dino from the Designer Series Paper. The finishing touch is the Denim ribbon. So cute!

Details for today's card

Today's cards really show case the Designer Series Paper and what you can do to make creative and fun cards. The first card is a top fold card, while the other two are side folds. Take a look at your Designer Series papers... are there areas that could be cut out (or die cut) to become focal images? could you mix several papers together to create a fun background? are there two papers that are mostly monochromatic that you could mix together? These are all fun ways to use your Designer Series Paper to create cards.

Products Used:


You can now follow my blog by email! Yep... brand new posts in your inbox!

Are you in the United States? I would LOVE to be your Stampin'Up! Demonstrator!


If you are in the United States and not currently working with a Stampin' Up! Demonstrator, you can order supplies in my online store, here.


0

Get Ink'd techniques with Welcome Easter Bunnies

Wednesday, May 20, 2020
Hey Y'all!

Have you found your way over to the YouTube channel yet? I am slowly adding content there too. This has been something I have wanted to do for a while but allowed fear to stop me. But this Corona- what ever has given me the opportunity to stretch myself and now I have a channel. Jackson is keeping me in check and making sure I have content for you. Speaking of Jackson (proud momma moment coming) he graduates tomorrow night. I can't believe that I no longer have grade school children. Does that officially make me old? LOL

Back to the new video and the technique. I love learning new things and when I saw the beautiful card Connie Collins made using this technique I had to try it. So it's a faux alcohol ink type technique, and you can see it in action over on YouTube. I did want to mention a few things here that I didn't really do on the video (still learning y'all!). Here is the finished card that I made using the bunny I made in the video and the one I colored with Stampin' Blends. You can really seen the color difference.


I took one of my aqua painters and filled it with alcohol (just regular 70% from Walmart- ok probably Target but you get it right?). I didn't really squeeze the alcohol out of the painter. It was there to help keep the painter wet, until I needed to clean the mix of hand sanitizer out of the brush. Then I squeezed. Also I noticed that my ink was separating. What I mean is it had a chromatography happening and the crumb cake color was separating into the colors used to make it. I really like the end result though. The little bunny reminds me of the Velveteen Rabbit story. So my tip would be make your mix as you need it and try not to let it sit. You can see the color separation in this close up. I thought it was the paper but the paper is still super smooth.


Also in the video I used the biggest acrylic block I have. You really don't need anything that big but I wasn't really sure what was going to happen so I figured to get the least used block in my stash. lol.

Here is the video:


I hope that you try this technique out and tell me what you think!

Products Used:


You can now follow my blog by email! Yep... brand new posts in your inbox!

Are you in the United States? I would LOVE to be your Stampin'Up! Demonstrator!


If you are in the United States and not currently working with a Stampin' Up! Demonstrator, you can order supplies in my online store, here.


0

Get Ink'd with Forever Greenery....

Tuesday, May 19, 2020
Hey y'all!

I am LOVING this new Forever Greenery suite. Today I wanted to do something a little different. I usually do not use the laser cut anythings. But these Forever Gold Laser- Cut Speciality Papers FOREVER   are STUNNING! Since I wanted to showcase the gold fold background on this card, I created a background on Basic Black cardstock using one of the larger leaf images.


Details for today's card

The card is a thick Whisper White side fold card. I used Basic Black as a base to emboss some of the images with Whisper White embossing powder. I did not use the embossing buddy and you can see sprinkles of embossing powder that stuck to the card (thank you Arkansas humidity).  I punched a 2 1/4" circle our of Just Jade (one of the new In Colors) and placed that behind the gold rectangle to ground my focal area. I stamped and die cut the rounder looking leaf image in two different colors and die cut them with the coordinating die. While I had the die cut machine out I die cut the large leaf die in Vellum Cardstock. I love layering Vellum Cardstock on focal images! I used the greeting stamp "Hello" to add a message. A little addition of the gold trim from the Forever Greenery Trim Combo Pack and this card was done.

Products Used:


You can now follow my blog by email! Yep... brand new posts in your inbox!

Are you in the United States? I would LOVE to be your Stampin'Up! Demonstrator!


If you are in the United States and not currently working with a Stampin' Up! Demonstrator, you can order supplies in my online store, here.


0

Unboxing: Forever Greenery

Y'all!!
Today I did a thing. Today I started a YouTube channel! I know right??? This has been my big scary thing for a LONG time. I've been talking about this for a couple of years now but I always found an excuse... don't have the right equipment, don't have the right lighting, don't have a big beautiful craft space, don't have the kind of voice you want to listen to, and I'm not a big enough expert. Well today I crossed over that bridge... and every single possible roadblock that technology decided to send my way! But I did it! Here is the video...


Now let's look at the card. This one was based on the idea of using up your scraps. I wanted something that would use every single inch of these beautiful new papers. And this is what I came up with.


Details for today's card

This card is a side fold card base of Whisper White Thick Cardstock. I then cut a rectangle of Basic Black (1/8" smaller than my card front). My Designer Series Paper strips are 1" by 3 7/8" long. I was able to squeeze 5 strips across by being mindful that they needed to be super close together. I then used the circle die from Painted Poppies Dies and one of the fern leaf dies from the new Forever Greenery suite to create my tag area. A circle of Just Jade cardstock anchors the whole thing. Full disclosure: in the making of this video I ended up making 4 of this card. UGH! Learning new things really is trial and error and trying again.

Products Used:


You can now follow my blog by email! Yep... brand new posts in your inbox!

Are you in the United States? I would LOVE to be your Stampin'Up! Demonstrator!


If you are in the United States and not currently working with a Stampin' Up! Demonstrator, you can order supplies in my online store, here.


0

One Day One Set Challenge: Tropical Designer Series Paper

Monday, May 18, 2020
Hey y'all!

How about another One day One set challenge? Today I am using the paper products from the Tropical Oasis suite. The stamps are staying but everything else is headed out the door, including one of my all time FAVORITE embossing folders. I'm sure it will pop up here and there because I love it so much! This suite is part of the January- June Mini Catalog and at the time of this post the items I am using are on the retiring list but still available while supplies last. So if you fell in love run to my store and snatch them up. Here is what I came up with...


 This was actually the second card I made but I love it!!! I loved the way the greeting tag is tucked under the Braided Linen Trim. I stamped the pineapple once and then a second time before re-inking and stamping the inside of the card in the same way.


 This was the first card I made. I LOVE the bright colors in these flowers. I stamped the palm trees on a 2" circle and matted that circle on a 2 1/4" circle of So Saffron. I used my FAVORITE embossing folder to create some texture on this card.

This card uses the Memories and More cards as a focal image and the sticker to decorate the inside of my card. I used the colors in the flowers to pick my card base color. I decided that the light pink shade in the palm leaf paper would look amazing against Melon Mambo, and it does if I do say so myself!. I added one of the charms and some rhinestones and a stamped greeting to complete the card.


 I just couldn't stop creating with this set! The hubs even came in and wanted to go to bed before I cleaned up my area and quit. That adorable flamingo card was the last one I made and it is my absolute favorite! It reminds me of my childhood in Florida. The beach, Ybor City, walking to the grocery store and standing in the frozen section to get cool again.

That was a LOT! But I hope you loved the cards as much as I did making them! See you next time for One Day One Set challenge!

Products Used:


You can now follow my blog by email! Yep... brand new posts in your inbox!

Are you in the United States? I would LOVE to be your Stampin'Up! Demonstrator!


If you are in the United States and not currently working with a Stampin' Up! Demonstrator, you can order supplies in my online store, here.


0

New! 2020-2022 In Colors

Friday, May 15, 2020
Hey y'all!
We are getting a new set of colors. Each year  Stampin' Up! retires 5 colors from the In Color collection and replaces them with 5 new color that stick around for 2 years. This years colors are some of my favorites. And they work SO well with the 2019-2021 In Colors so well. Introducing the colors....


What do y'all think? I am in love with these colors and can not wait to get my hands on the ink pads. During pre order season demonstrators and happy shoppers are given a small sampling of items in the new catalog that we can get early. The new In Colors are always part of that sampling. This year with things the way they are the inks are delayed, but I am SOO grateful that I am able to get my hands on so many different things and I've been forced to think creatively. And honestly, I LOVE that creative problem solving. So here are my cards that I made first thing,


Details for today's card

I decided to make a set of cards using the Flowers for Every Season Memories and More Cards and Envelopes. I love that this whole product suite uses the new In Colors. This was the only part of the suite I purchased and specifically so I could complete this project. Totally need a shrugging emoji right here.  These card bases are larger than a standard card and have a matching envelope. I used the .... set to create a focal rectangle in front. Now a tip... if you have cardstock and a VersaMark pad you can create an image that looks like it was stamped with the coordinating inks!


This is a close up of the Cinnamon Cider card. I used VersaMark ink on the Cinnamon Cider cardstock to create these little flowers. It looks like I have the matching ink right? I love this trick!

Products Used:


You can now follow my blog by email! Yep... brand new posts in your inbox!

Are you in the United States? I would LOVE to be your Stampin'Up! Demonstrator!


If you are in the United States and not currently working with a Stampin' Up! Demonstrator, you can order supplies in my online store, here.


0
Powered by Blogger.
BloglovinEmailPinterestTPT