#alittlekinder: old olive

Showing posts with label old olive. Show all posts

Get Ink'd #9 Wonderful Card

Friday, May 25, 2018
Hey y'all!! I hope that you are enjoying warm weather where you are. It's about to be HOT... like center of the sun hot here in the south. Some days I feel like we skipped spring completely. I have just one week of teaching left until summer vacation. I have one big goal for this summer (besides enjoying every minute I can before we pack AC off to collage) and that is figure out how to do videos and start a YouTube channel to share more about the process! Any tips?

So today's card was inspired by our annual summer trip. This summer we are headed to the red wood forests. I am looking forward to spending time with my family and planning out blog posts! And this card gets me in the spirit!

I started out using a watercolor technique for making the background (see this would be a great video, right?) Then I stamped the large tree ring stamp in crumb cake then fussy cut it out. I used Stampin' Dimensionals to pop it up. I stamped the message in Old Olive and also fussy cut that. The parts that are on the tree ring are glued to the image, the parts hanging off have dimensionals under them as well. It just keeps everything on the same level.

This set also has a coordinating set of framelits called Nature's Roots. I didn't pre order those but now that I'm working with this set, I feel like I need them. Another really exciting thing is that this set looks WONDERFUL when used with the Lovely as a Tree set! 

Thank you for stopping by, I hope you are inspired to create something today! See ya' next time!

Supplies:


I would LOVE to be your Stampin'Up! Demonstrator!


If you are in the United States and not currently working with a Stampin' Up! Demonstrator, you can order supplies in my online store, here.


0

Get Ink'd #5 Share what you love (Gotta have it all)

Sunday, May 13, 2018
Hey Y'all!
This was the suite that I purchased. I decided that it was truly the best value of any of the bundles. I love the mission statement stamp. Here are 4 cards that I made using the new DSP and the new Lovely Floral 3D Dynamic Textured Impressions Embossing Folder.

The Gotta Have it All Bundle is made up of: 

Stamp Sets:

  • Love What you do Stamp Set
  • Make a Difference Stamp Set
  • Statement of My Heart Single Stamp (Free with purchase),


Paper:

  • Very Vanilla Cardstock
  • Share What you Love Cardstock
  • Pearlized Doilies
  • Share What you Love DSP


Ink and Embellishments:

  • Grapefruit Grove Classic Stampin' Pad
  • Rich Razzleberry Velvet Ribbon
  • Share What you love Artisan Pearls
  • Lovely Floral Dynamic Textured Impressions Embossing Folder Very Vanilla (Free with purchase)
  • Share What you Love Embellishment Kit (Free with purchase). 


 Card Details:


  1. Start with Very Vanilla Card base (5 1/2" x 8 1/2") and emboss the Lovely Floral embossing folder. Tip: spray a little water on to cardstock to help loosen the fibers and get a better impression.
  2. Use sticky notes to mask off the embossed image. Leaving about 2" of card exposed at the bottom.
  3. Take the small leaf from the Love What you Do stamp set and stamp in Old Olive. Make sure you stamp over the sticky note with some images. 
  4. Add sentiment. I used "I'm Lucky to have a friend like you" one. 


  1. Start with Very Vanilla card base (5 1/2" x 8 1/2"). 
  2. Cut a 5 1/2" x 3" strip of DSP. I loved the page with what looks like watercolored images. The back of this paper is the Rich Razzleberry strip. You will need a 1/2" of a coordinating paper (mine is the Rich Razzleberry Stripe). 
  3. Cut a rectangle of Very Vanilla Cardstock 2" x 3". Layer it on top of a 4"x 3 1/2" rectangle of Old Olive. Tear the edge of the Old Olive paper. 
  4. Stamp and color one of the flower images. 
  5. Add one of the mini paper clips from the Share What You Love embellishment kit. 
  6. Stamp a sentiment. This one uses a cool technique that looks like ombre. Ink up your stamp and stamp it off. Then ink up half of the image again. The top part of the image is second generation and the bottom is full strength first generation stamping. 


  1. Start with a card base made from Mint Macaron (11"x 4 1/4"). This is a top folding card. 
  2. Cut a piece of Share What you Love DSP to 5 1/4 x 4". In a coordinating DSP cut a 1/2" strip. Layer these on to the card base.
  3. Cut a 2"x 3" rectangle of Very Vanilla cardstock. Stamp one of the flower images in Grapefruit Grove and the sentiment in Basic Black ink.
  4. Layer on to a rectangle of Rich Razzleberry cardstock (2 1/2" x 3 1/2"). Use Stampin' Dementials to pop up the sentiment. 


  1. Start with a card base of Rich Razzleberry cut to 5 1/2" x 5 1/4". Score at 1 1/4" from the left side. This is going to fold over the DSP.
  2. Cut a rectangle of DSP to 4 1/4 x 5 1/2". 
  3. Fold over the 1 1/4" flap and adhere to the DSP. 
  4. Cut out 2 ovals with the layering thinlets and the Big Shot. The smaller over is Very Vanilla and the larger oval is Mint Macaron. 
  5. Stamp the Statement of the Heart in Grapefruit Grove ink. 
  6. Layer on to card over one of the pearlite doilies. 
  7. Add a rose embellishment.

I would LOVE to be your Stampin'Up! Demonstrator!


If you are in the United States and not currently working with a Stampin' Up! Demonstrator, you can order supplies in my online store, here.


0

Get Ink'd #4: Share what you love (A Little More, Please)

Tuesday, May 1, 2018

Hey Y'all!
Today I'm sharing a few things that I made using the items in the A Little More, Please suite. This suite kicks things up by including embellishments,colored card stock, and the alphabet set call  "Make a Difference".  This set excites me because of the ability personalization options. Y'all this set also meets Stampin' Up! angel police that allows you to sell your hand stamped cards and items.

This first card uses Make a Difference for the sentiment. I have fallen in love with the simplicity of this card. The Very Vanilla cardstock was embossed with the Layered leaves embossing folder.  Then stamp one of the images down a 2 inch strip of Very Vanilla cardstock. To get the color on the edge, simply slide the paper edge over the top of your stamp pad. You don't have to press down hard at all. I added the words thank you in Basic Black.


The next card is simple up has a little pizzaz. The large flower image is stamped on to 1.5 inch squares. The bottom square is popped up with Stampin' Dimentionals and has some twine wrapped around it. You could use any small sentiment or stamp one with the letters from Make a Difference. The fun of this card is actuallly the Old Olive images on the left. I used a post it note to block off part of the card. I stamped first and second generation images (remember that's fancy words for stamped before re inking to get a lighter image) to create what looks like a Designer Paper.


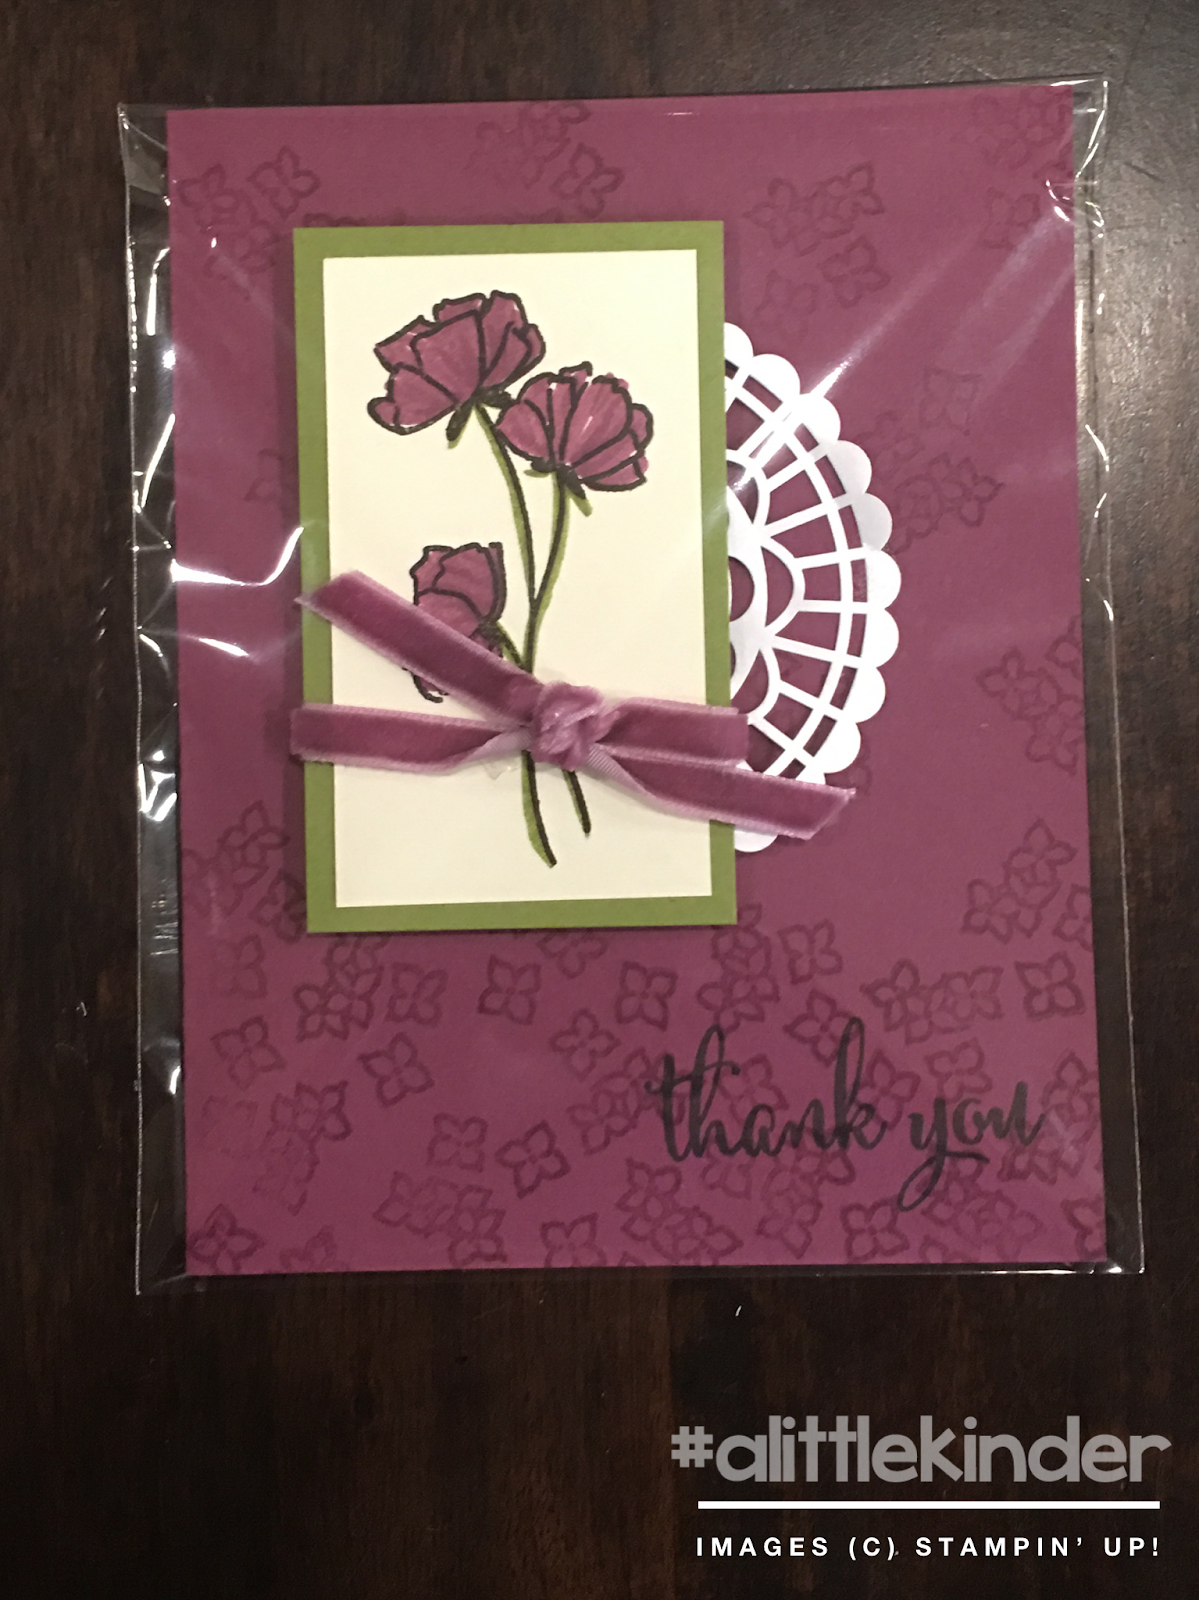
Y'all I am not a girly girl and doilies... oh my, so not my thing. But the doilies that come with this suite aren't frilly or old fashioned. They are pearlized and have more of a stained glass feel.  They grew on me! LOL! Actually they sat on my table saying... Use me. I'm fun. (What your craft supplies don't speak???) I needed a little something with this card. The Rich Razzleberry cardstock is stamped with Versamark ink. I stamped the images closer together at the bottom and spread them out more at the top. I stamped the large flower image on Very Vanilla paper and used the Stampin' Write markers to fill them in (you could have used the Stampin' Blends markers if you were lucky enough to get them during Sell-a-bration.) Then I added the velvet ribbon (lushish yall!!) and it STILL needed something. So I started playing with the doilies. I like the feel that they added.


I realize I shouldn't have favorites. I mean it just isn't fair to all the other cards I made but y'all!!! This card is just all that and some! Let's talk about making this card. I knew I wanted to show 4 cards with this set but I was stuck at 3. AND I really hadn't used much from the embelishment box. So I dumped everything out on my work area. I picked up this and I picked up that and then I wondered if the large tag was big enough for the large flower image. So I stamped it. IF you as my pre school students they will tell you my favorite color is pink. And that is truth. I love pink but I wanted to something with the Grapefruit Grove color and honestly the cardstock wasn't doing much talking to me. So I watercolored the flowers and stamped the word beautiful. Added a little knot of the velvet ribbon and some Stampin' Dimentionals and BAM!


There you have it. My take on the A little More, Please suite. For a set that I wasn't sure I would love, I am really having fun creating with it! The next Get Ink'd will focus on cards made with the Gotta Have it all Suite. And there will be a 3D Get Ink'd using this set as well. I told you I warmed up to the set and actually have enjoyed stamping with these images.


I would LOVE to be your Stampin'Up! Demonstrator!


If you are in the United States and not currently working with a Stampin' Up! Demonstrator, you can order supplies in my online store, here.


0

Get Ink'd #3 Share what you love (Just Getting Started Ideas)

Monday, April 30, 2018
Hey y'all!
On Saturday I got a BIG OL' BOX of stamping goodies!!! As a demonstrator, I am able to pre-order one "suite" and it arrived. Ok so a suite is really just a kit of goodies based on a stamp set that Stampin' Up! releases early to demonstrators. This year it's the Share what you love stamp set.

Let me be COMPLETELY honest here, I didn't love this set when I first saw it. I was kind of sad this was the set that was picked. There are SO many awesome sets in the new catalog that I thought would have made a wonderful "suite". Then I started thinking about how the "suite" packages were presented to demonstrator and y'all!!! I totallly changed my mind. Each of the suites are designed with different stampers/ crafters/ folks in mind. The first level is called "Just Getting Started". This will be the suite we focus on. I have listed the individual products below because the suite isn't available until May 1, and if you happen upon this post after May 31 then the suite will no longer be available.

Today I am sharing some cards using just the materials in the Just getting started set. The first card I am going to share is my version of the amazing Susan Wong's card. This card was probably the card that made me excited about this early release suite. This card was made using Grapefruit Grove and Old Olive ink. I also used Momento or Basic Black in for the message.


This next card I LOVE and y'all it's just one card and INK! Yep... this one I wanted to keep super simple. I love to design cards with lots of detail but sometimes ya' just need a go to super quick great looking card. 

To make this card you will need Rich Razzleberry and Crumb Cake ink and Very Vanilla cardstock or cards and envelopes. The large background image from the Love what you do set was inked in Crumb Cake and stamped off once to create a lighter version of Crumb Cake (this is called Second generation stamping). The large flower is also created using a second generation stamping technique. I started with the image in the middle stamped in Rich Razzleberry, without re- inking the stamp I stamped it again at the top of my image. Then I re-inked and stamped off on scratch paper, and stamped the lower image. Last I added my message in Rich Razzleberry. 

Y'all I have a serous love affair with polka dots (don't tell my husband ok?) This next card is my version of a polka dot card made with Grapefruit Grove and Basic Black ink.


 So there are two little "blobs" in this set that could be used to make polka dots with. I went with the smaller of the two. Using first and second generation stamped images (that's big fancy for inked then stamped and stamped a second time without re- inking) I made the background. I used a piece of Very Vanilla cardstock that I cut smaller than my card to stamp on. Then I popped this up using Stampin' Dimensionals.

So tell me, do you love this set yet? Be honest, remember I was. It's ok to not be there yet. Since there are 3, yep 3 different Share what you Love suites, I am going to share with you 2 more days of Get Ink'd using just those products. I can't wait for you to see what I came up with!!


I would LOVE to be your Stampin'Up! Demonstrator!


If you are in the United States and not currently working with a Stampin' Up! Demonstrator, you can order supplies in my online store, here.


0
Powered by Blogger.
BloglovinEmailPinterestTPT